Day48 - ECS 🚀
day48 of 90daysofdevops

Packaged App Development Associate @ Accenture | Infrastructure Engineering | Exploring Cloud & Security
🈂️ What is ECS?
ECS (Elastic Container Service) is a fully-managed container orchestration service provided by Amazon Web Services (AWS). It allows you to run and manage Docker containers on a cluster of virtual machines (EC2 instances) without having to manage the underlying infrastructure.
With ECS, you can easily deploy, manage, and scale your containerized applications using the AWS Management Console, the AWS CLI, or the API. ECS supports both "Fargate" and "EC2 launch types", which means you can run your containers on AWS-managed infrastructure or your own EC2 instances.
ECS also integrates with other AWS services, such as Elastic Load Balancing, Auto Scaling, and Amazon VPC, allowing you to build scalable and highly available applications. Additionally, ECS has support for Docker Compose and Kubernetes, making it easy to adopt existing container workflows.
Overall, ECS is a powerful and flexible container orchestration service that can help simplify the deployment and management of containerized applications in AWS.
🈂️ Difference between EKS and ECS?
EKS (Elastic Kubernetes Service) and ECS (Elastic Container Service) are both container orchestration platforms provided by Amazon Web Services (AWS). While both platforms allow you to run containerized applications in the AWS cloud, there are some differences between the two.
👉 Architecture: ECS is based on a centralized architecture, where there is a control plane that manages the scheduling of containers on EC2 instances. On the other hand, EKS is based on a distributed architecture, where the Kubernetes control plane is distributed across multiple EC2 instances.**
👉 Kubernetes Support: EKS is a fully managed Kubernetes service, meaning that it supports Kubernetes natively and allows you to run your Kubernetes workloads on AWS without having to manage the Kubernetes control plane. ECS, on the other hand, has its own orchestration engine and does not support Kubernetes natively.**
👉 Scaling: EKS is designed to automatically scale your Kubernetes cluster based on demand, whereas ECS requires you to configure scaling policies for your tasks and services.**
👉 Flexibility: EKS provides more flexibility than ECS in terms of container orchestration, as it allows you to customize and configure Kubernetes to meet your specific requirements. ECS is more restrictive in terms of the options available for container orchestration.**
👉 Community: Kubernetes has a large and active open-source community, which means that EKS benefits from a wide range of community-driven development and support. ECS, on the other hand, has a smaller community and is largely driven by AWS itself.**
In summary, EKS is a good choice if you want to use Kubernetes to manage your containerized workloads on AWS, while ECS is a good choice if you want a simpler, more managed platform for running your containerized applications.
Task :
Set up ECS (Elastic Container Service) by setting up Nginx on ECS.
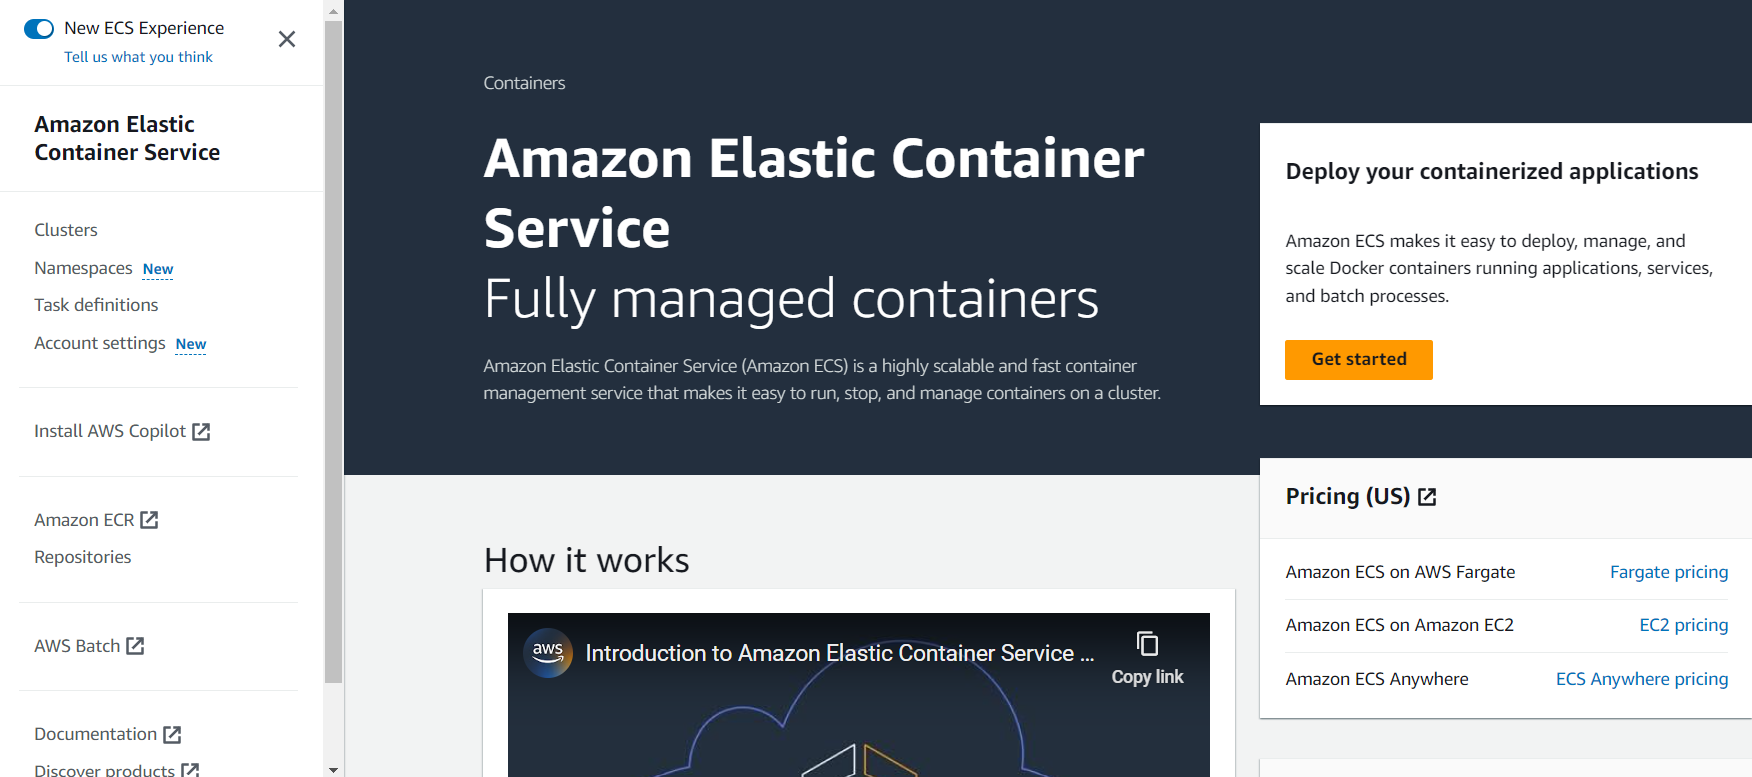
Log into the AWS Management Console and search for “ECS”:
This will open the Clusters page, where you can create your cluster:

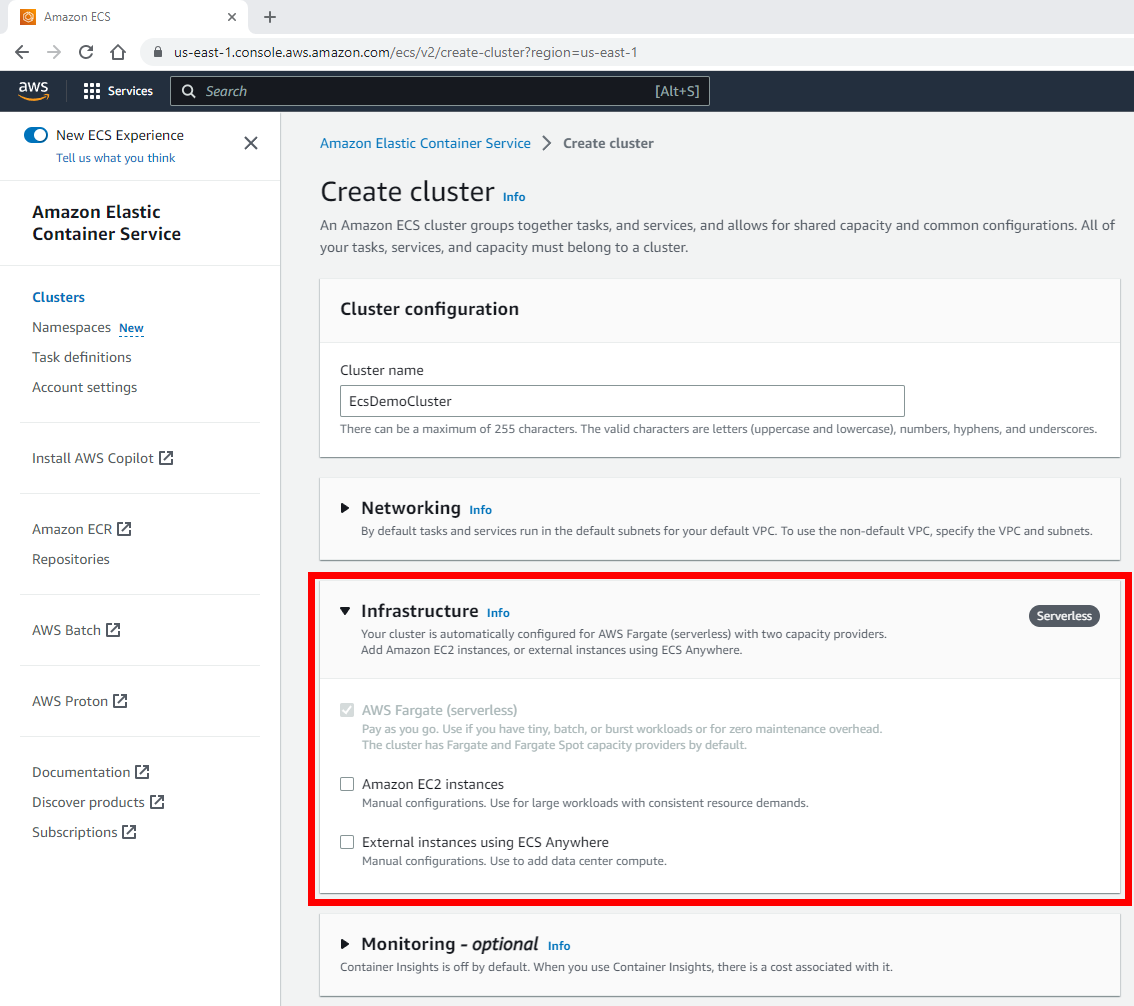
To create the cluster, click on Create Cluster, which will take you to the Cluster configuration page:

Now, expand the Infrastructure section, which can be found after the Networking section
To create the cluster, click Create Cluster on the right. This will take about twenty minutes, and you should see a notification at the top of the screen letting you know the cluster creation is in progress:
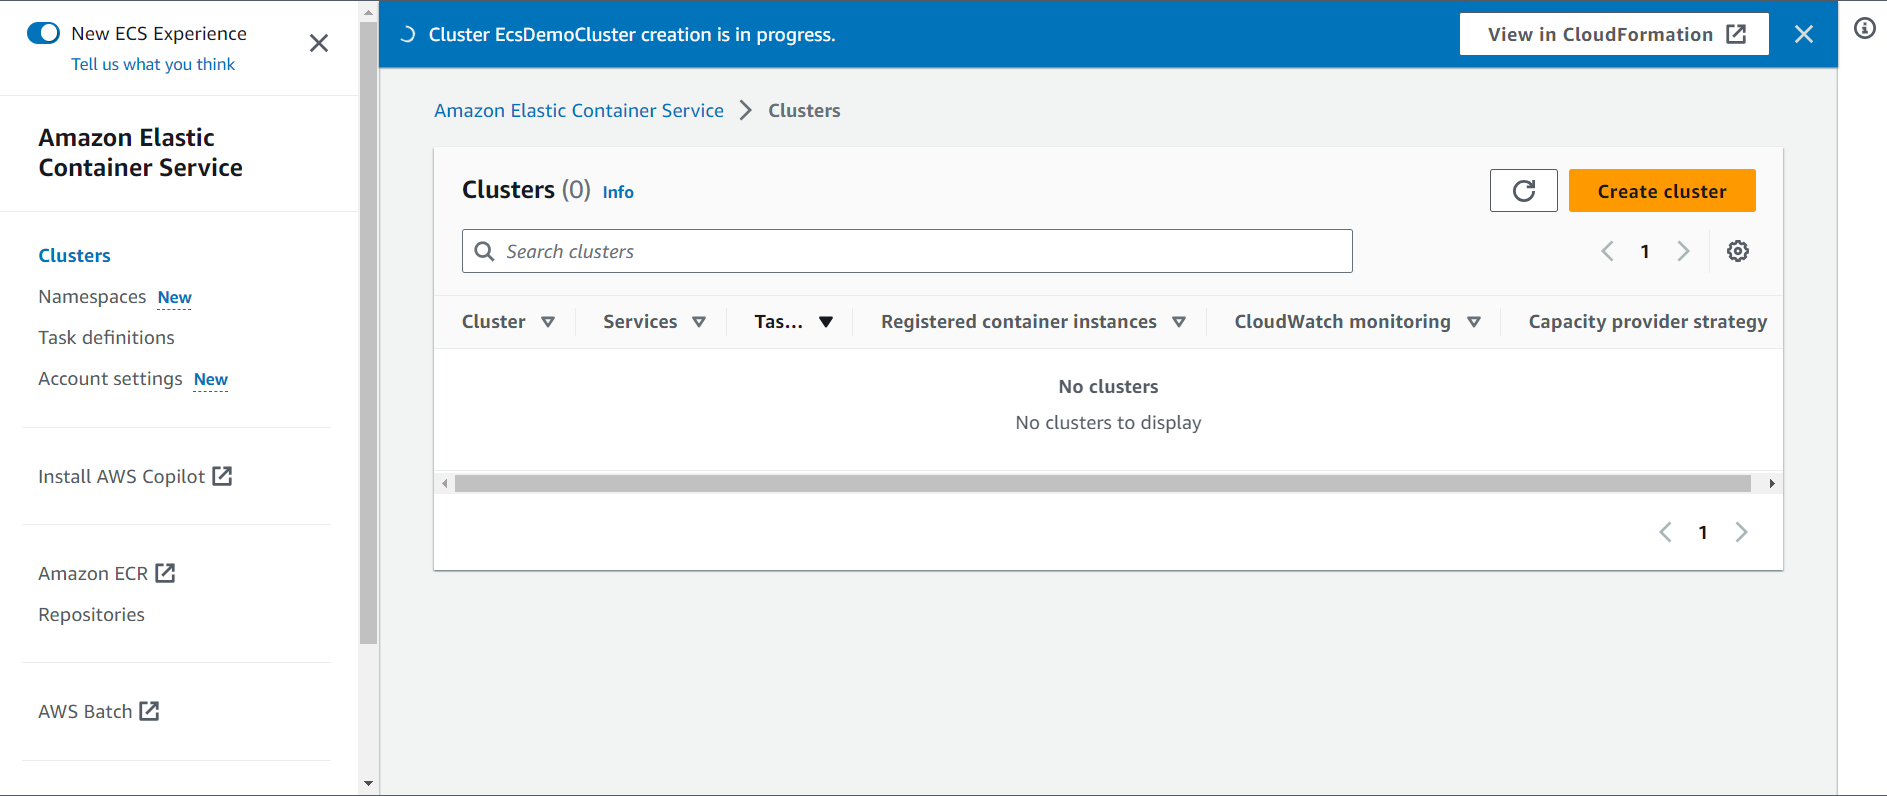
Once the cluster has been created successfully, you’ll receive a confirmation message, and the cluster will now be listed in your All Clusters list:

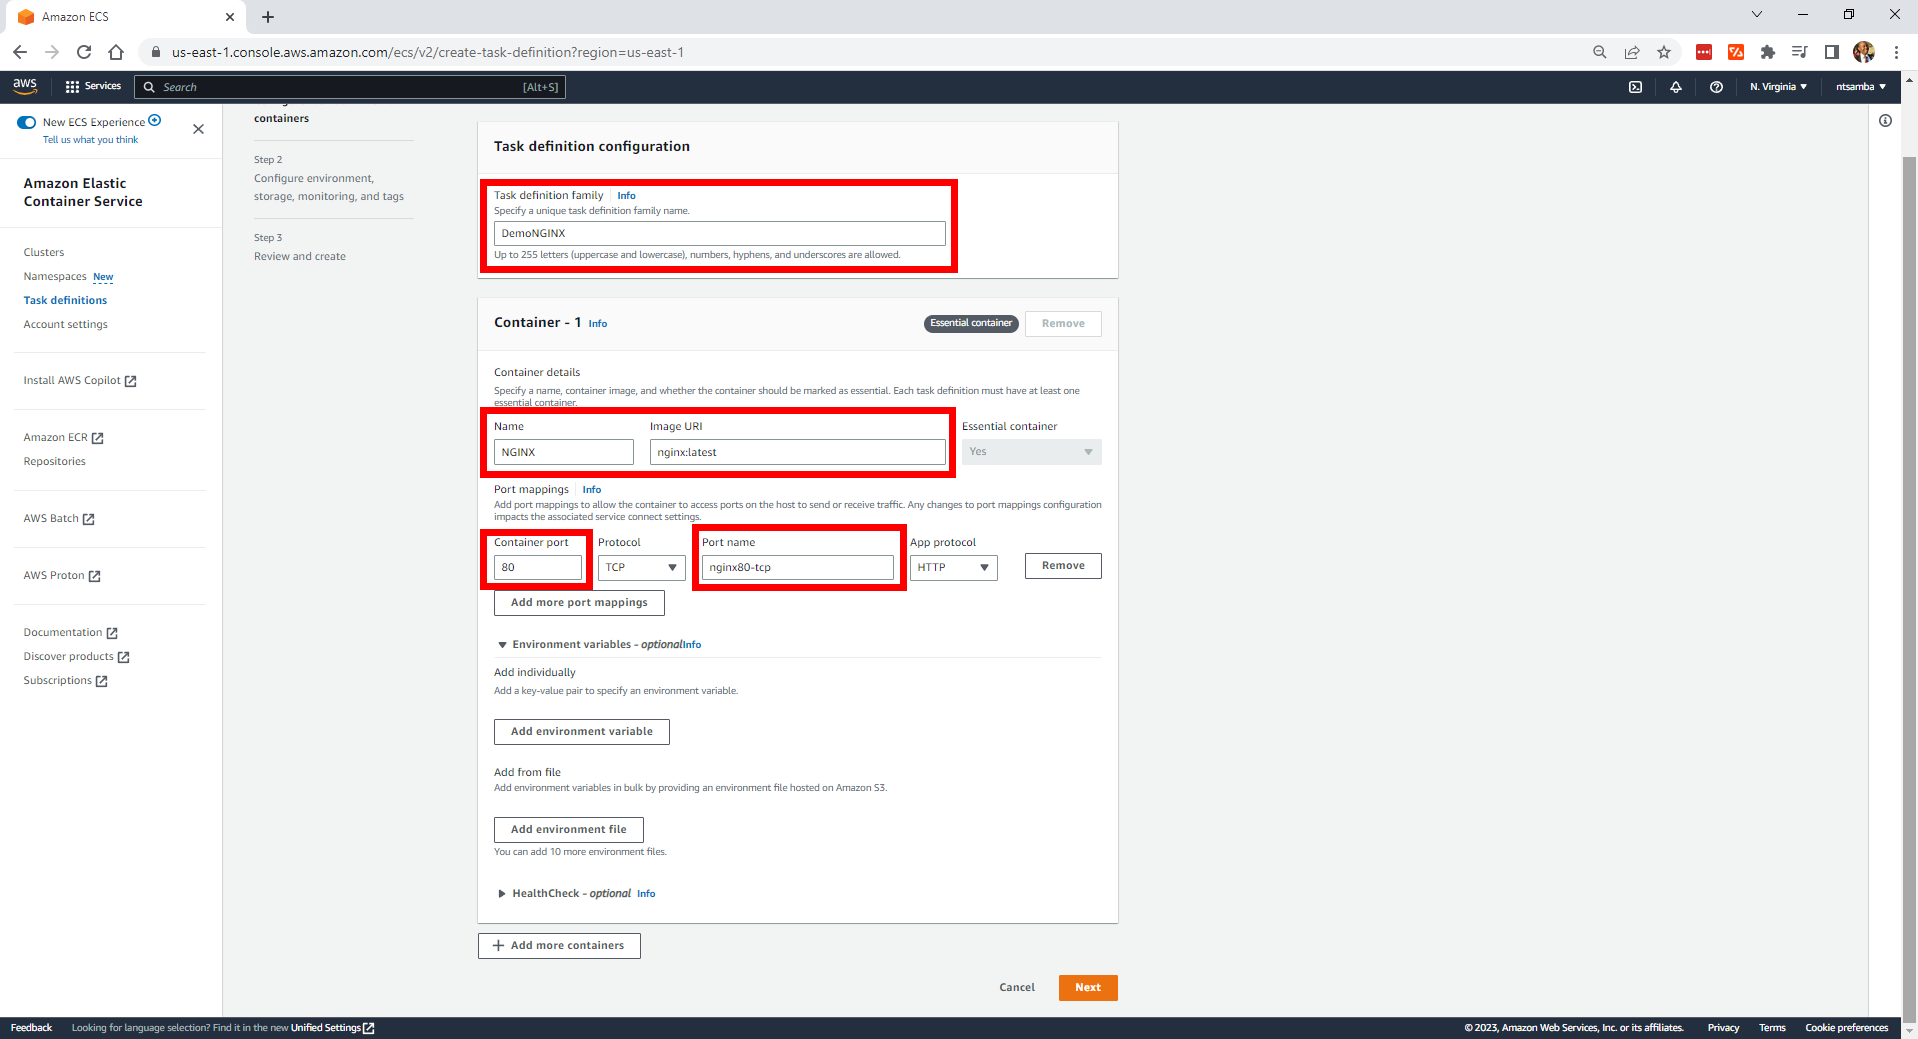
Create a Task Definition
To create a task, click Task definitions from the menu on the left. This will open the Task definition configuration page:
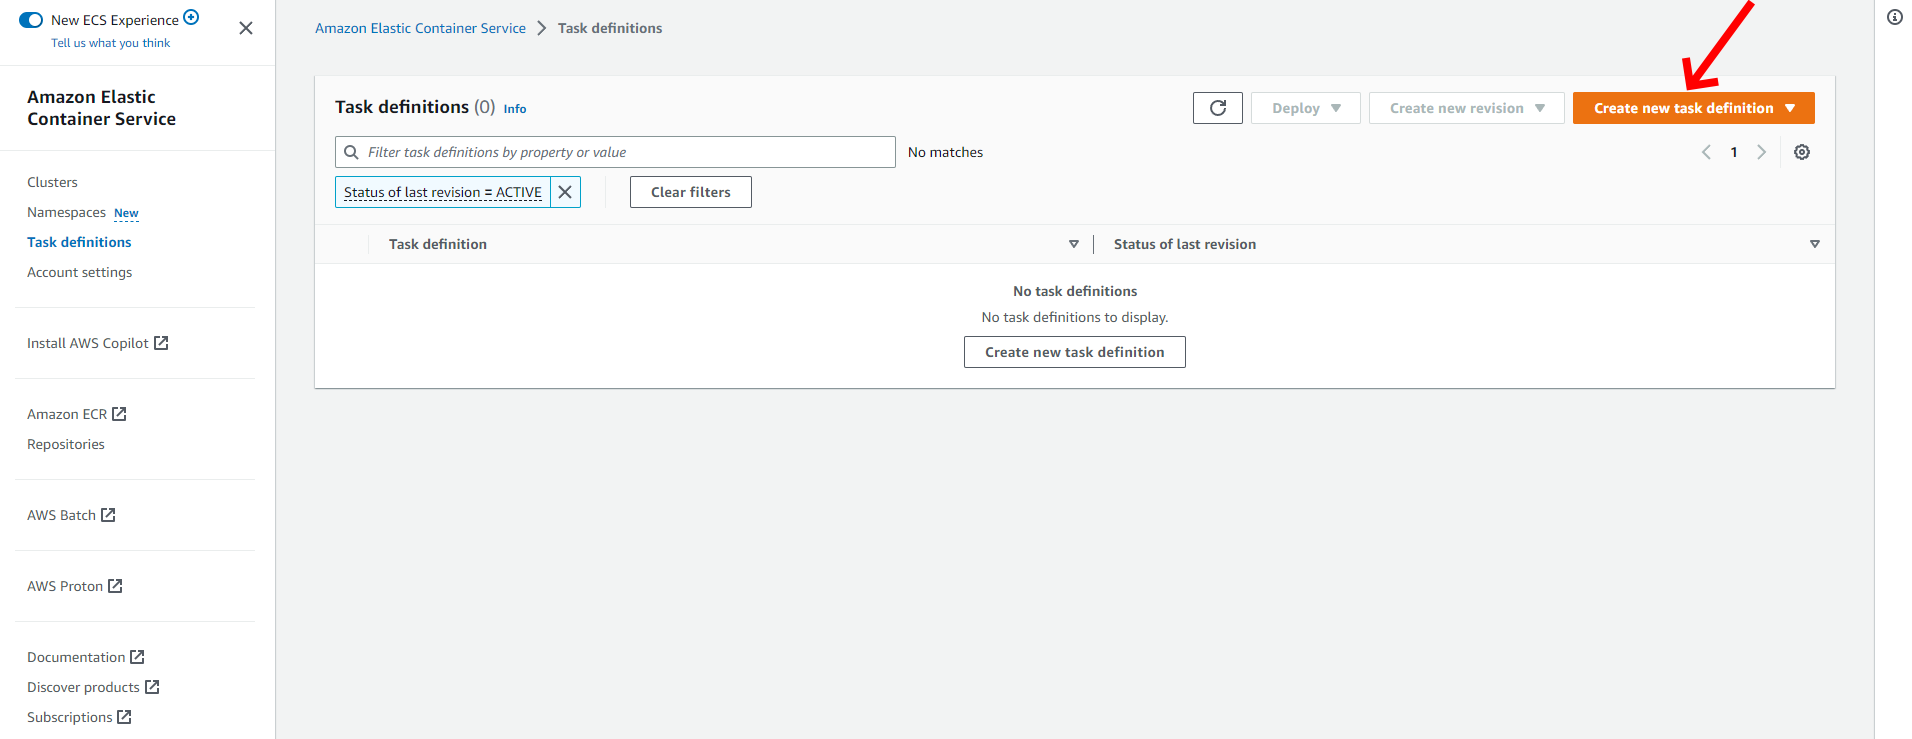
Then click on Create new task definition to configure the task definition:
Leave everything else as is and select Next. This will take you to the Review and create page, where you can review your settings:

If everything looks good, click on Create at the bottom to create the task definition. You would get a confirmation message if the DemoNGINX task definition was created successfully:

Deploy the Application
Now you need to create a service to run the application. Click on the Deploy drop-down in the upper right-hand corner and select Create service:

This will open up the Create service page. Under Environment, select the cluster that you created previously (ie “EcsDemoCluster”) and keep everything else as it is:

Scroll down to Deployment Configuration and give your service a name. Here, “nginx-ecs-service-demo” was used:

Scroll down and expand the Networking section and enable the Public IP:

Enabling the Public IP allows the container to communicate directly with the internet without any intermediate services or gateways:
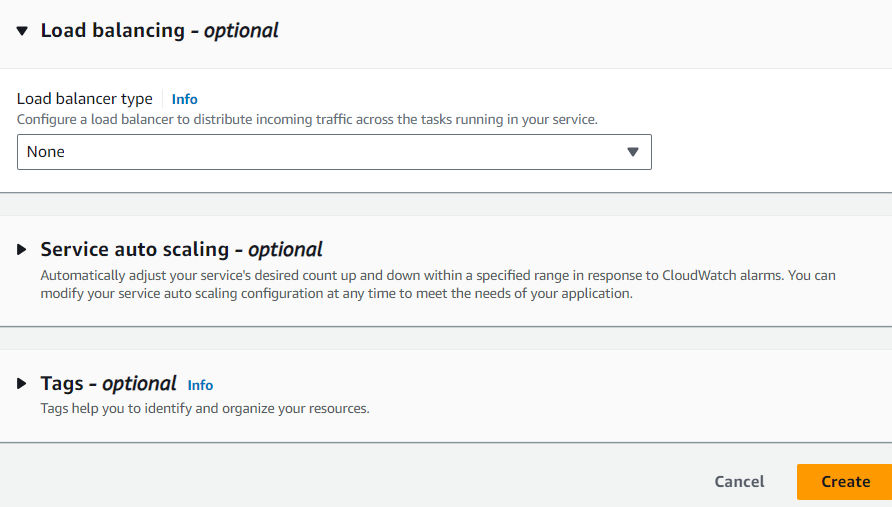
Scroll down and expand the Load balancing section:
Like before, you should see that the service creation is in progress:
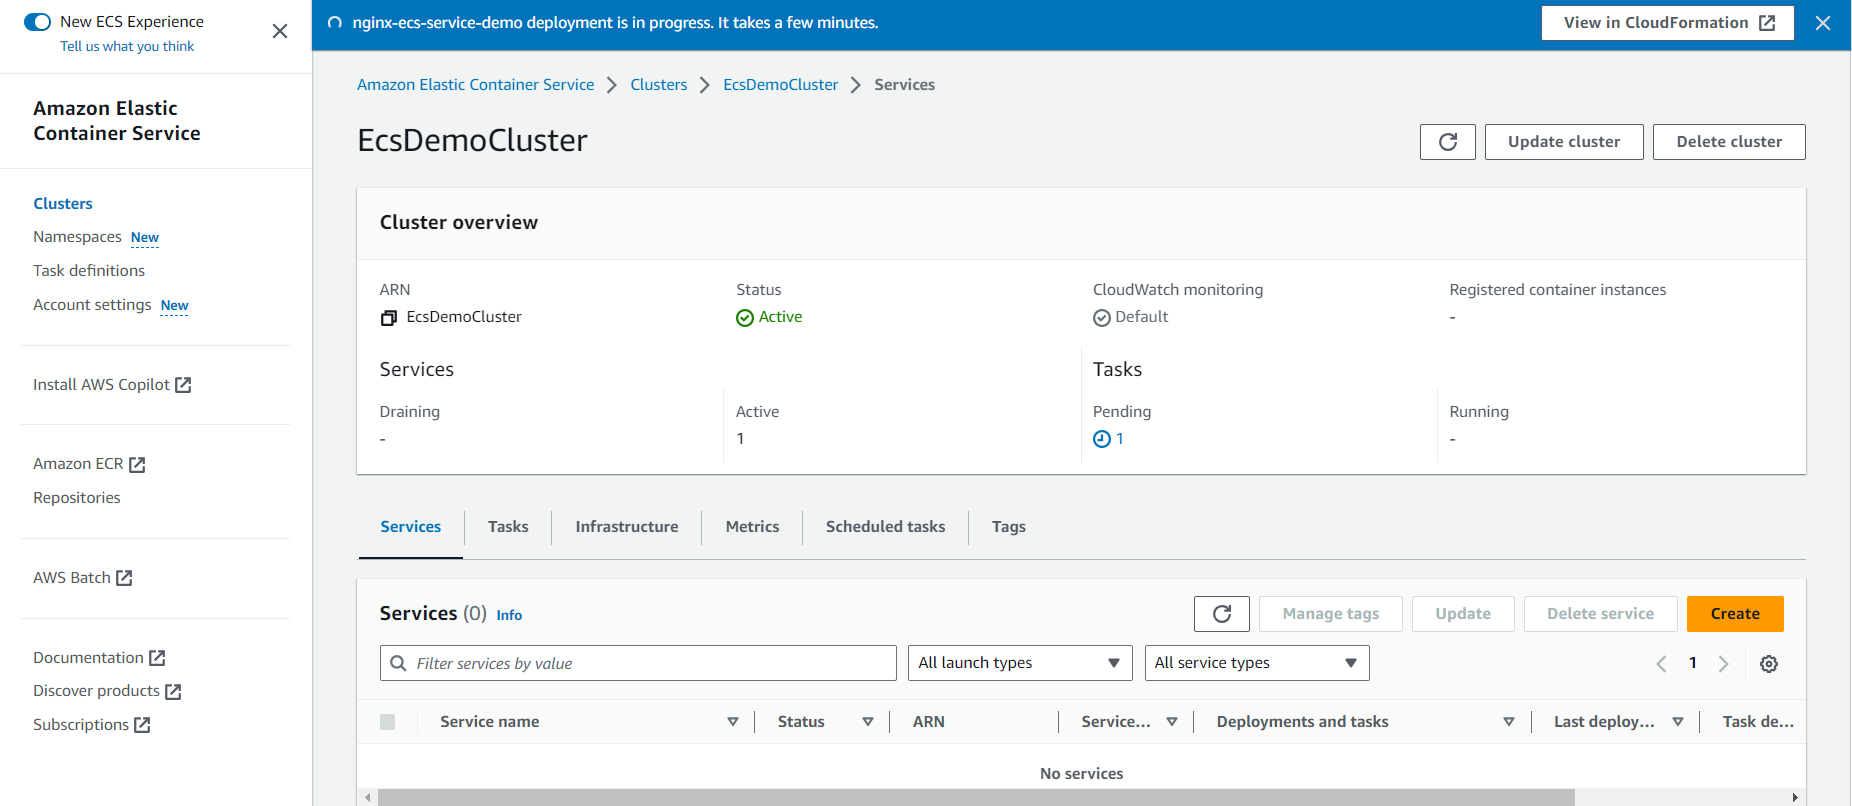
After a few minutes, you’ll see the “nginx-ecs-service-demo” service.
If the service deployment goes through successfully, it will notify you and run the task:

To verify the service is running, select the Tasks tab:
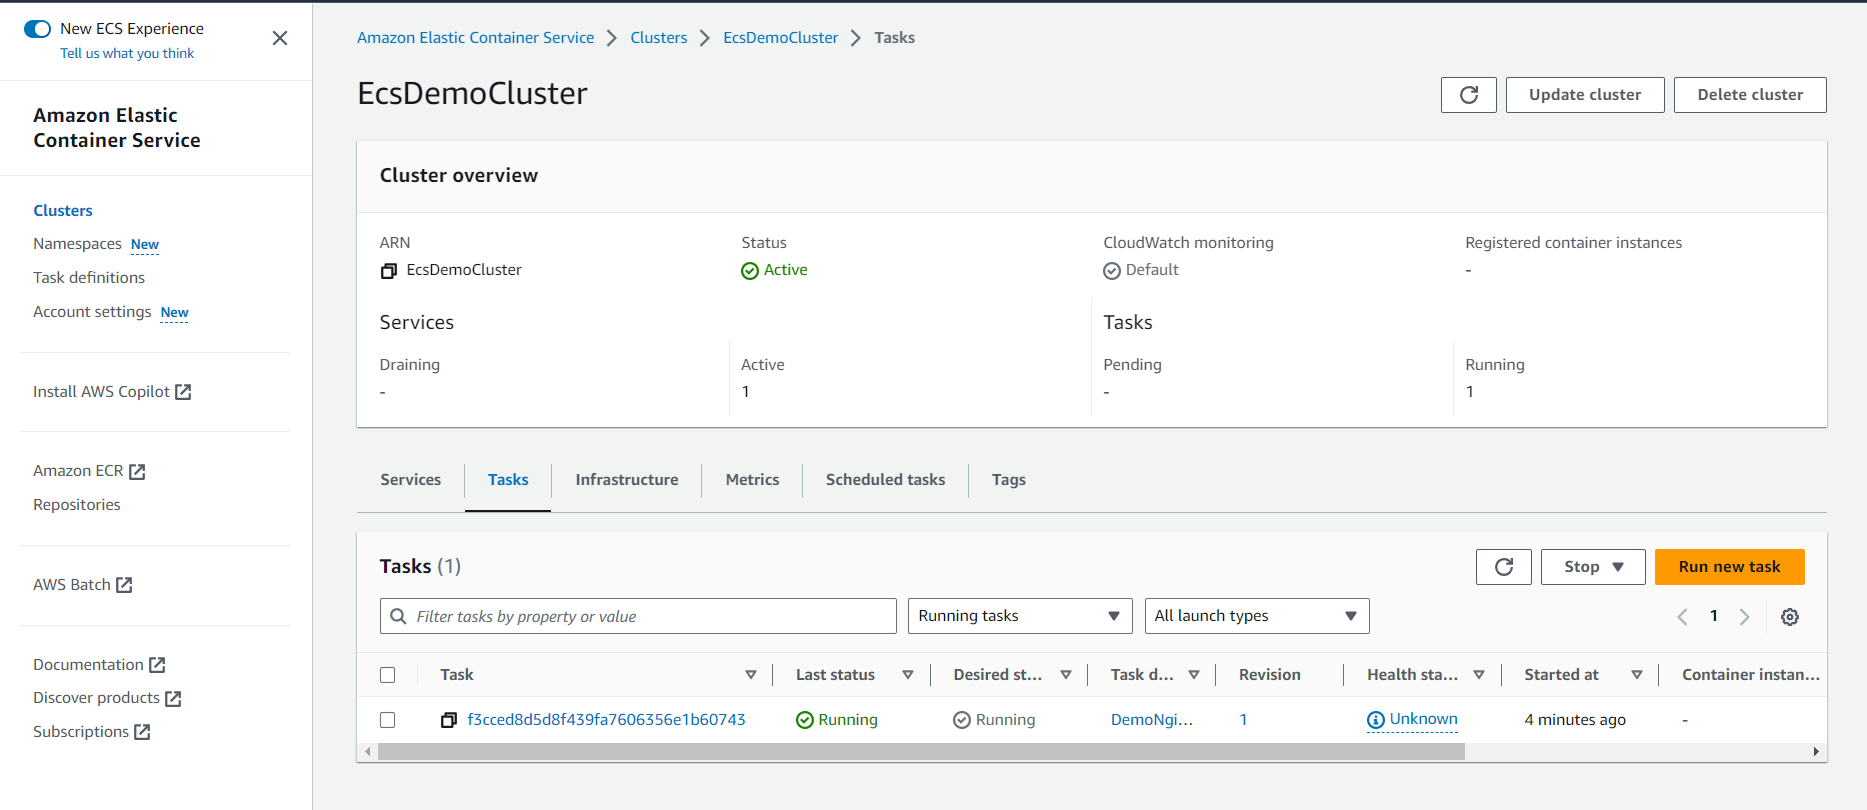
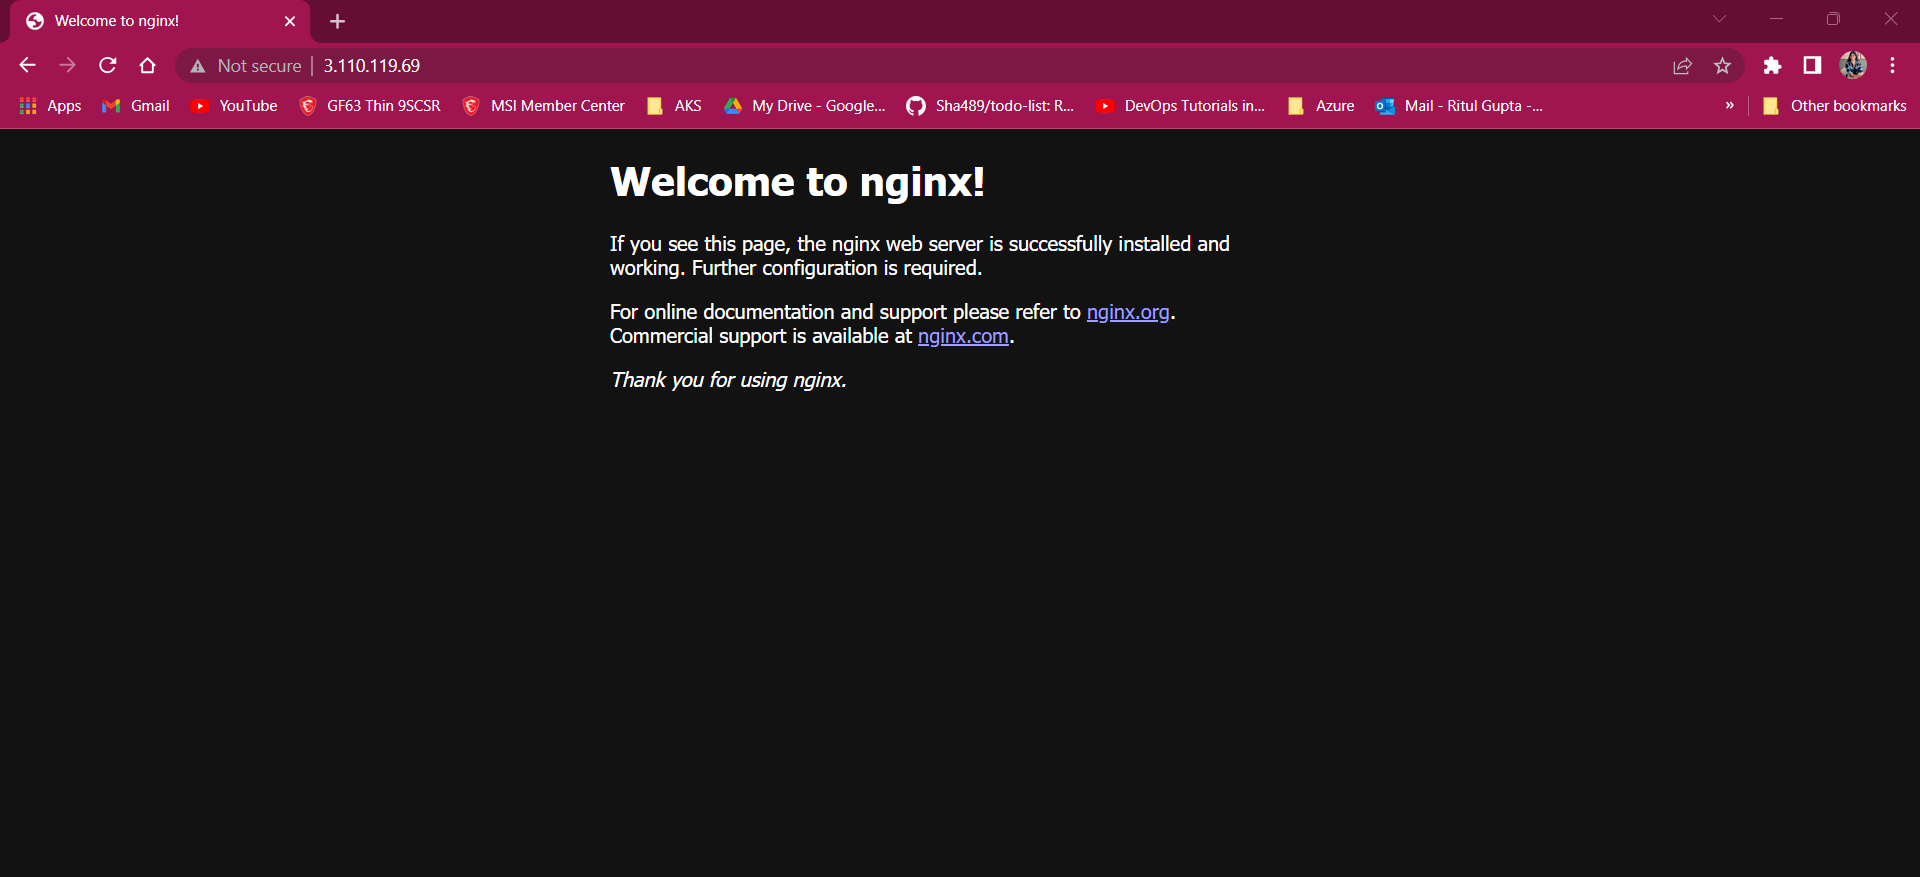
Check that both the Last status and Desired status are running and click on the Task ID to open the task. Then under Configuration, click on open address or copy the public IP address and paste it into your browser:

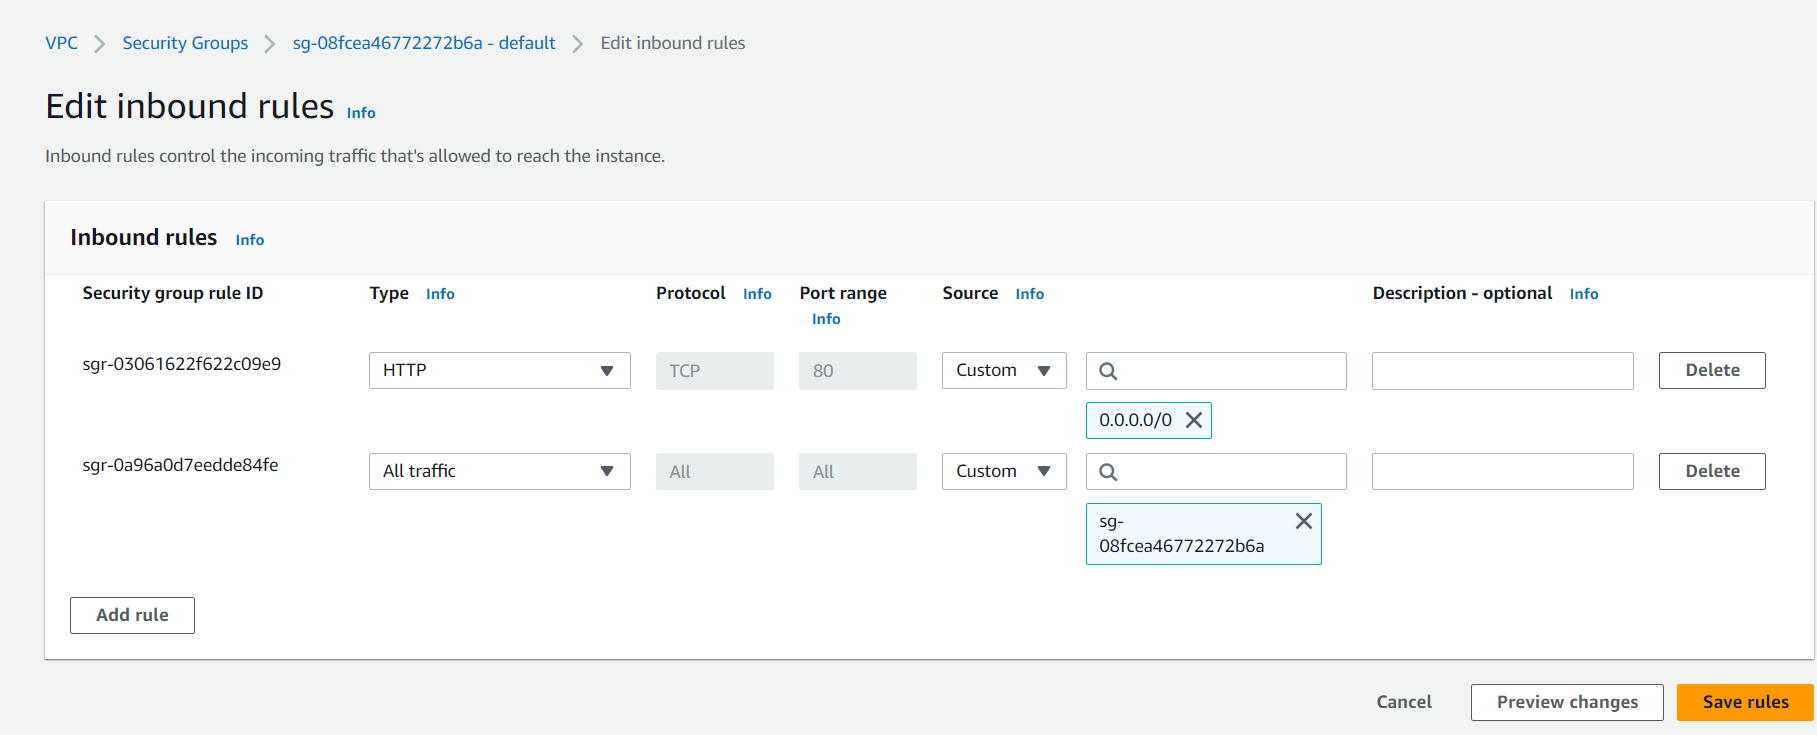
Note: In the security group within the VPC, port number 80 should be allowed for Nginx to be accessible.
You should see your application running, and if it is i.e. showing you a Welcome to NGINX page, you’ve successfully deployed a container on Amazon ECS:
Thank you 😀
Happy Learning :)


