Kubernetes Architecture and Components, Kubernetes Installation and Configuration
24th April Monday
☸ What is Kubernetes?
Kubernetes is an open-source Container Management tool that automates Container deployment, container scaling & load balancing.
It schedules, runs, and manages isolated containers which are running on Virtual/Physical/Cloud Machines.
All top Cloud Providers support Kubernetes.
☸ History
Google developed an internal system called 'borg' (later named as omega) to deploy and manage thousands of Google applications and services on their cluster.
In 2014, google introduced Kubernetes an open-source platform written in 'Golang' and later donated to CNCF.
☸ Kubernetes Installations tool
Minikube
Kubeadm
☸ Feature of Kubernetes
Orchestration
Autoscaling
Auto-Healing
Load Balancing
Platform Independent
Fault Tolerance
Rollback
Health Monitoring of containers
Batch Execution (one-time, sequential, parallel)
☸ Architecture of Kubernetes

Role of Master node
Kubernetes designates one or more of these as masters and all others as workers.
The master is now going to run a set of K8s processes. These processes will ensure the smooth functioning of the cluster. These processes are called "Control Plane".
Can be a Multi-master for high availability.
The master runs the control plane to run the cluster smoothly.
Component of Control Plane (Master node)
✏️ Kube-API server (For all communication)
This API server interacts directly with the user (i.e. we apply .yml or json manifest to kube-Apiserver)
✏️ ETCD Cluster
Stores metadata and status of Cluster.
ETCD is a consistent and high-available store (Key-value store)
Source of touch for cluster state (info about the state of the cluster)
✏️ Kube-Scheduler
Responsible for scheduling the pods on the nodes.
It just decides which pod to place on which node band on the CPU, RAM, and resources on the Node.
Kubelet places the nodes after the scheduler decides.
The right container/pod is sent to the right snip/node.
✏️ Kube-Controller Manager
Continuously monitor various components of the cluster and works toward managing/restoring to the desired state.
* Node Controller
Communicates with kube Apiserver and manages nodes. [Every 5 seconds]
Checks again for 40 seconds then mark as "unreachable"
After 5 minutes it replaces
*Replication Controller
Responsible for monitoring the status of the replica set.
Ensures that desired no. of Pods are available at the required time.
✏️ Kubelet
The agent running on the node.
Listens to Kubernetes master (eg:- Pod creation request)
Use Port 10255
Send success/fail reports to master.
✏️ Container Engine (Docker)
Works with Kubelet
Pulling images
Start/Stop Containers
Exposing containers on ports specified in the manifest
✏️ Kube-Proxy
Assign IP to each Pod.
It is required to assign IP addresses to pods(dynamic).
Kube-Proxy runs on each node & this makes sure that each pod gets its own unique IP address.
These 3 components collectively consist of "node".
*POD
The smallest unit in Kubernetes.
POD is a group of one or more containers that are deployed together on the same host.
A Cluster is a group of nodes.
A Cluster has at least one worker node and a master node.
In Kubernetes, the control unit is the pod, not the containers.
Consist of one or more tightly coupled containers.
POD runs on a node, which is controlled by the master.
Kubernetes only knows about PODS (does not know about individuals container).
Cannot start containers without a POD.
One Pod usually contains one container.
*Replica sets
To prevent users from losing access to the app, the replication controller gives high availabilities.
Help in load balancing and scaling.
*Deployment
Pods deploy single instances of an application.
Deployment allows updating the pod's infrastructure with Replicas, Rolling updates, etc.
*Services
Helps us connect our applications with other applications/databases etc.

✏️ Kubectl
A command line tool used to communicate with a Kubernetes cluster's control plane.
Kubectl apply.
Creates the live object for the configuration

☸ Kubernetes Installations and Configurations
1.Login into AWS account-> Launch 2 Instances--> Ubuntu 22.04 LTS (t2.medium) Master must have 2 VCPUs and 4GB RAM and for Worker Node instance type (t2.micro).

2.Commands Common for Master and Worker Node
sudo apt-get update
3.Now install docker on all 2 instances
sudo apt install docker.io -y
4.To Check, whether docker is installed or not
sudo systemctl start docker
sudo systemctl enable docker
sudo systemctl status docker
5.Install kubeadm on both machines
Kubeadm is a tool for deploying a Kubernetes cluster. You can use the following commands to install kubeadm, kubelet, and kubectl:
sudo curl -fsSLo /usr/share/keyrings/kubernetes-archive-keyring.gpg https://packages.cloud.google.com/apt/doc/apt-key.gpg
echo "deb [signed-by=/usr/share/keyrings/kubernetes-archive-keyring.gpg] https://apt.kubernetes.io/ kubernetes-xenial main" | sudo tee /etc/apt/sources.list.d/kubernetes.list
sudo apt-get update
sudo apt install kubeadm=1.20.0-00 kubectl=1.20.0-00 kubelet=1.20.0-00 -y
6.The next step is to configure the master node
sudo su
kubeadm init
export KUBECONFIG=/etc/kubernetes/admin.conf
cat /etc/kubernetes/admin.conf
kubectl apply -f https://github.com/weaveworks/weave/releases/download/v2.8.1/weave-daemonset-k8s.yaml
kubeadm token create --print-join-command
7.The last step is to configure the Worker Node
sudo su
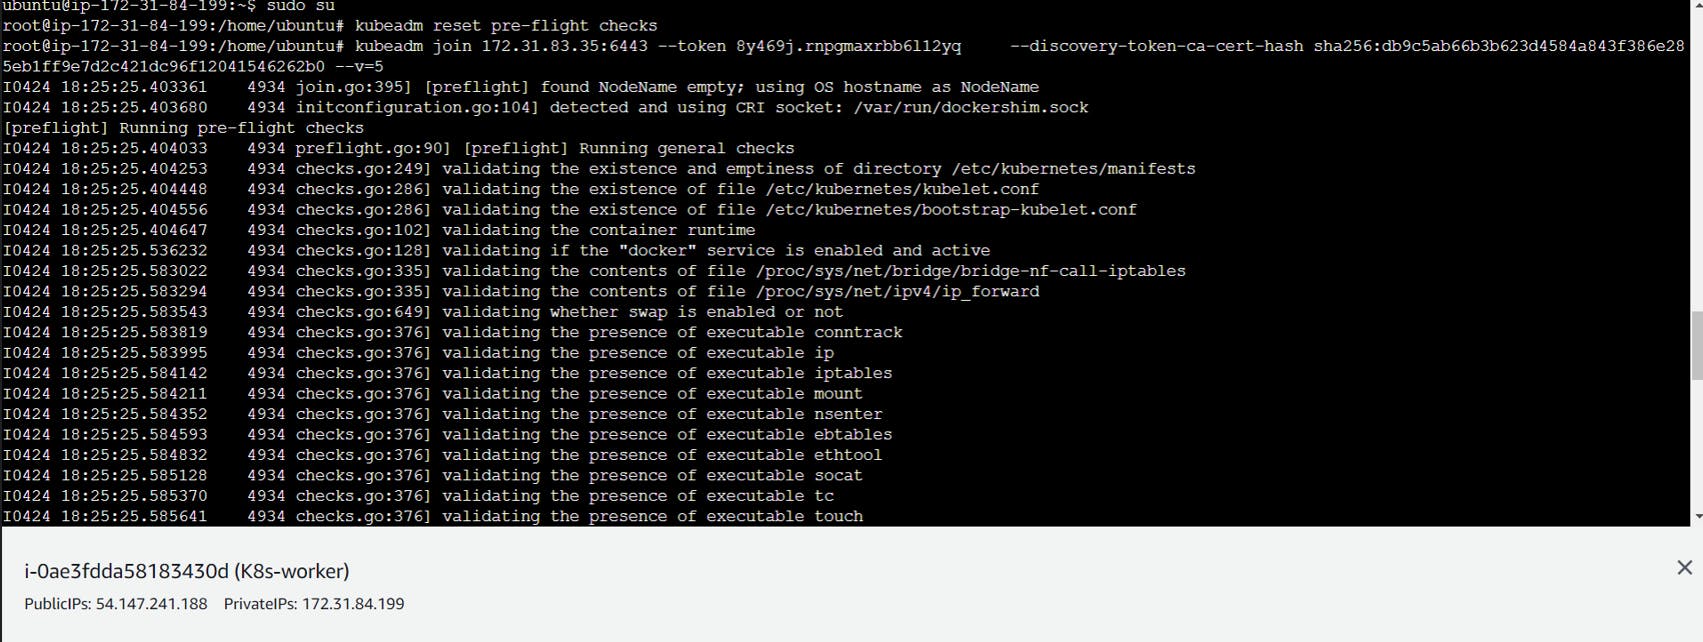
kubeadm reset pre-flight checks
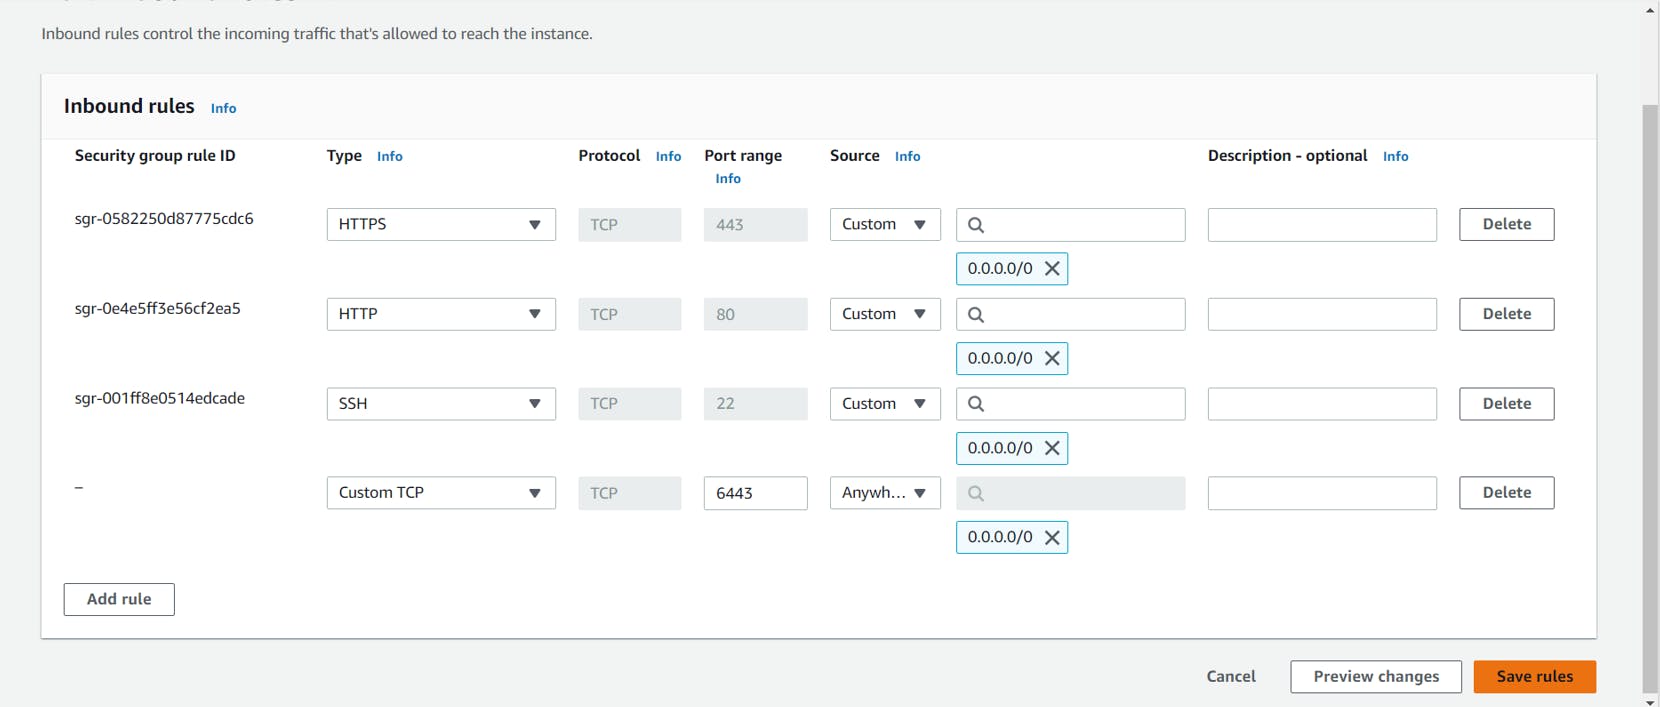
Firstly add an inbound rule in Master Node add Port No 6443

Copy the join command from the master node and paste it on the worker node with --v=5
kubeadm join 172.31.27.201:6443 --token myyblt.e9pldyfdu485b0fd --discovery-token-ca-cert-hash sha256:9e447885cb69c5218293852353a1a68c3073b7feae96ddf11456b15e2e6bbc73 --v=5

8.Verify the Cluster Finally, run the following command on the master node to verify that the cluster is up and running
kubectl get nodes

That's it! You now have a working Kubernetes cluster running on Ubuntu using kubeadm.
#Kubernetes #Devops #Trainwithshubham #Kubeweek #kubeweekchallenge
Thank You!!
